Monday, 26 August 2013

VMware vCenter 5.1 Server Installation Step by Step Guide

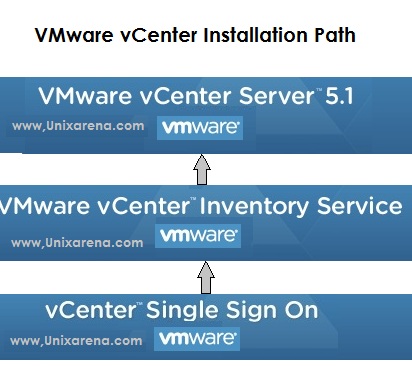
Last week we have seen VMWARE ESXi 5.1 installation.After reading that article, VMWARE ESXi beginners wonders that what will be next step after installation of ESXi and how to manage it ? To manage vmware ESXi 5.1, you need to connect to VMware vCenter server. Here we will see the installation of vCenter server with step by step screenshots. vCenter 5.1 has lot prerequisite stuffs that you need to do before kicks of the actual vCenter Server installation.


Note:These step is exclusively for VMWARE ESXi 5.1 beginners to practice on their laptop or Desktop using vmware workstation and i had installed without configuring active directory on windows 2008 server.In my case,i have installed windows 2008 server on vmware workstation as guest and will be using this as vCenter server.

Note:
Before you installing this.we need to Enable & install IIS & .Net Via server manager windows server 2008

 
Login to windows 2008 server where you want to configure vCenter server. 


1.Copy the "VMware vCenter Server 5.1" directory to windows 2008 server and execute the Vmware-vcserver.exe file.You can also start the installation using auto-run file which also available in this directory. 
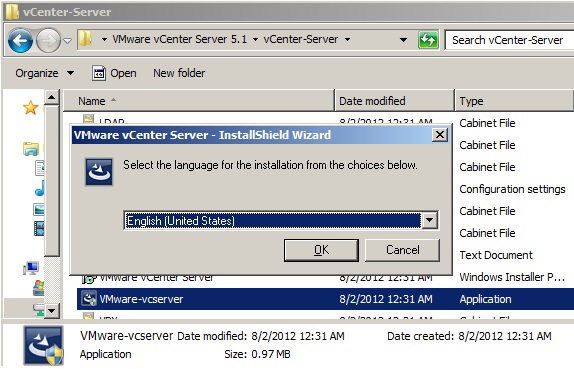


2.Select English and continue the installation.It will install Microsoft visual C++ libraries .


  3.After installing the Microsoft Visual C++ libraries ,vmware vCenter server installation will kick off.


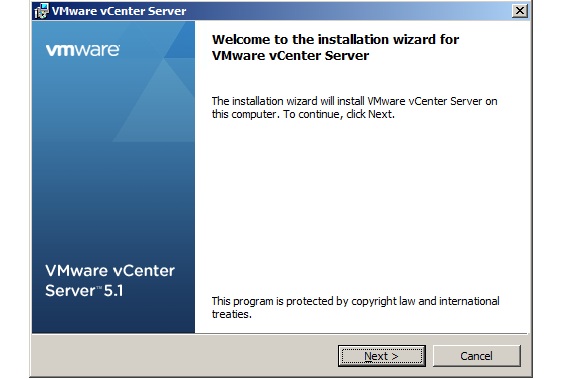
4.Click next to continue the installation.
 

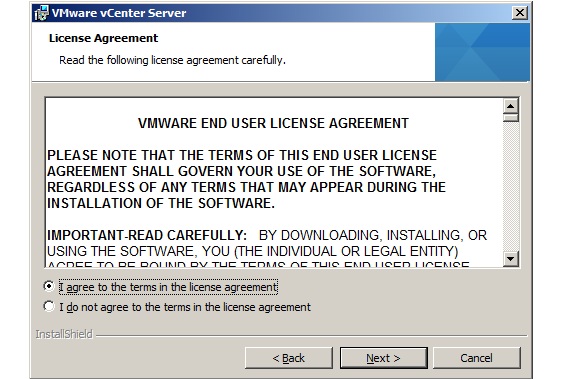
5.Accept the license agreement and continue the installation.

 
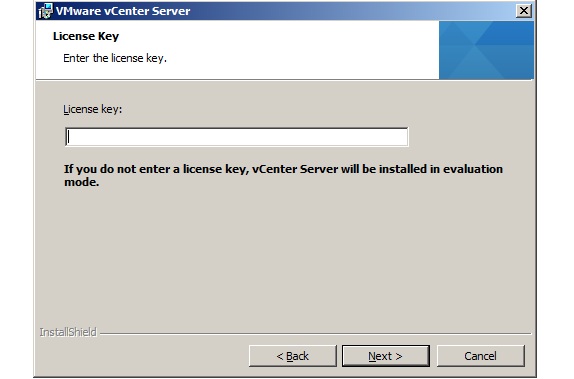
6.If you have valid license key for vCenter server,Just enter it .If you don;t have one just press "Next" to continue.(Evaluation period: 60days).

 
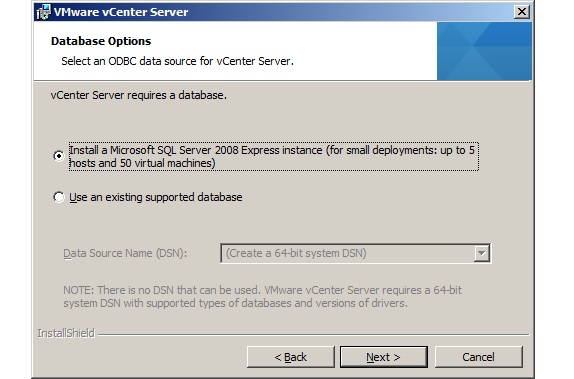
7. vCenter requires MySQL database to store the vCenter objects data.For smaller deployment ,you can use Microsoft SQL server 2008 express instance like the below screen.For larger deployments ,you need to provide the valid MySQL DSN names.
 
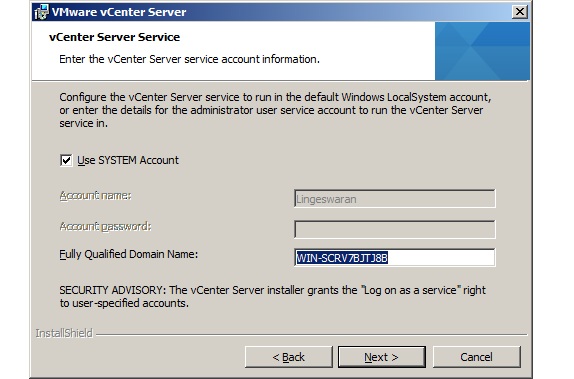
8.Create a new user account for vCenter server service to run or you can use windows server account by selecting Use SYSTEM Account.

  
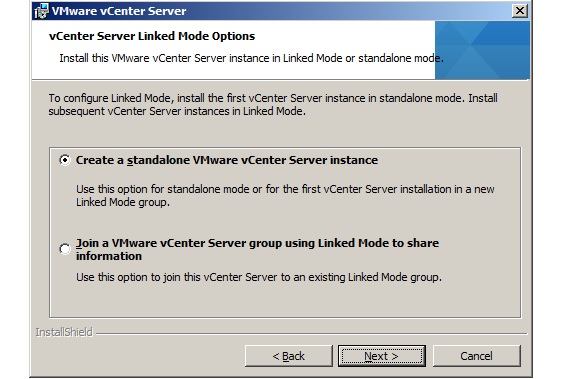
9.If this the first vCenter server in your environment,select standalone Vmware vCenter Server instance.


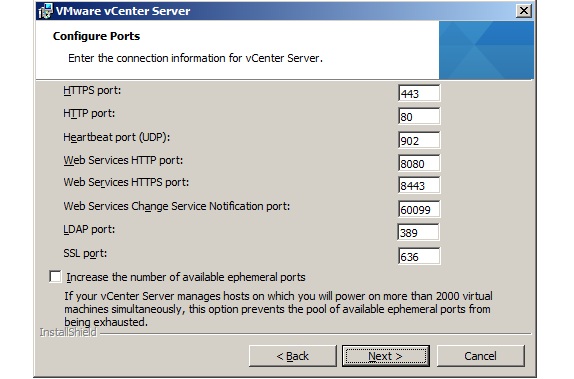
10.Configure the ports according to your environment.It better to choose the default ports for the vmware services. 
 

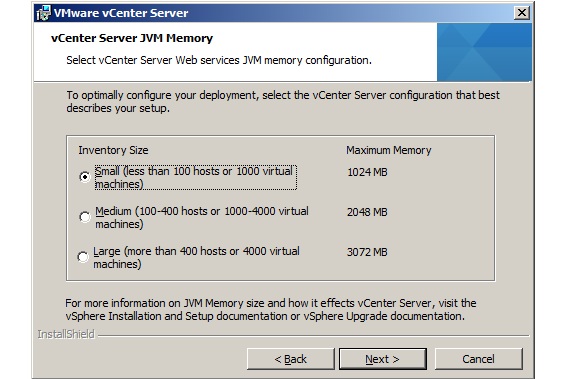
11.Installer will automatically takes JVM memory size according to that Inventory size.Select the the one matching to your environment.


12.Provide vCenter Single Sign On information.
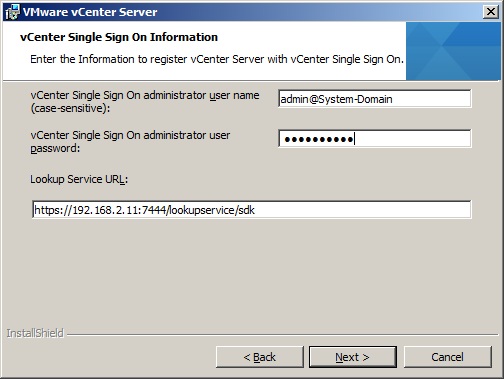


13. vCenter Server user/group name will be register with VMWARE vCenter SSO .
Here vCenter Server group name will be Administrators


14.Provide Vmware vCenter Inventory server information and Click Next to continue.


15.You can specify the installation location for vCenter server .


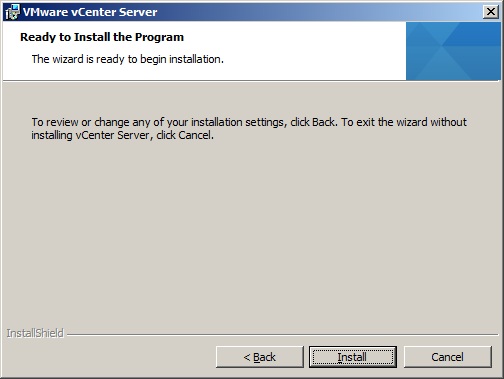
16.That's it.Just click "install" to install vCenter server now.


17.Click finish to complete the installation of vCenter server.
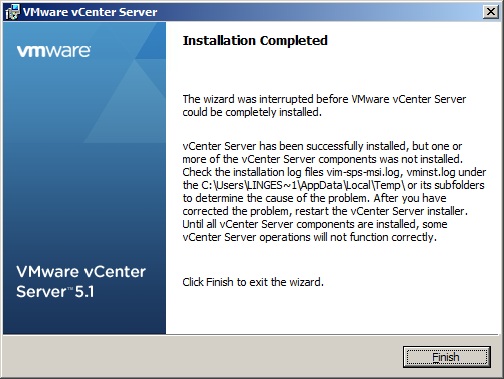


I was having small trouble while installing vCenter due to system resources and that's why there was some warning messages on the above screen.If you too get these kind of messages ,just re-run the same installer to install those missing components.


Finally rename the system name of the server and login with ad credential. using vSphere client
 

Saturday, 10 August 2013

Install VMware ESXi 5.1 with Screenshots

VMware ESXi is free. However, the software comes with a 60 days evaluation mode. You should register on VMware website to get your free license key to come out of the evaluation mode. Once the ESXi is installed, you can either user vSphere Client on the Direct Console User Interface to administer the host.

VMware ESXi is based on hypervisor architecture that runs directly on top of a hardware as shown below.

1. Download ESXi server

Get the software from the VMware ESXi download page.

Lets start now

Step1:

VMware VMvisor Boot Menu

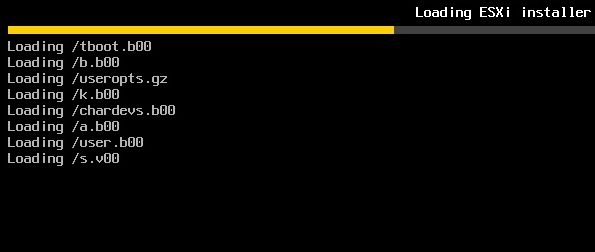
1.Insert the VMWARE ESXi5.1 DVD and power on the server. ESXi installer will load the necessary files for installation.
 

2.Once all the modules are loaded successfully,you will get the below screen with server configuration.


3.Continue the installation by just pressing enter key.


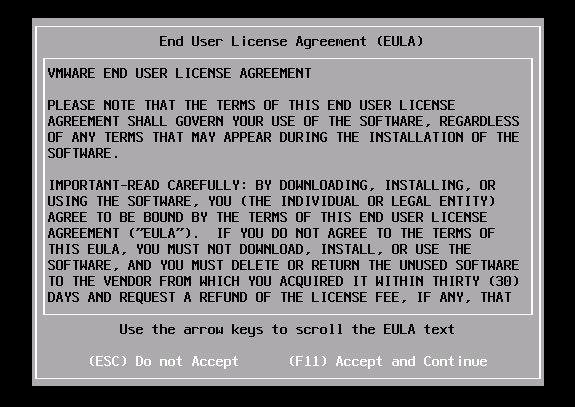
4.By default,you have to accept the license to continue the installation by pressing F11.


5.Select the disk in which you would like to install VMWARE ESXi 5.1.It requires minimum 4~ to 5~GB disk space.Enter to continue.

6.Select the keyboard layout.Here i am selecting "US Default".


7.Its time to secure ESXi  by providing the complex root password.Enter to continue.


8. Here the Installer gathers the system information before start copying the files to the disk.

9.Here will be the final confirmation you need to give before destroying any data on that disk.Press F11 to continue the installation.

10.Installation begins.

11.Reboot the system to complete the installation.Make sure that you  have removed the installation media from the server.


      Some of the console message while rebooting the system


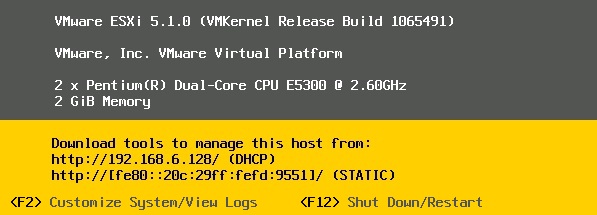
12.Now vmware EXSi 5.1 will boot from hard disk and you will get the below screen,once its completely up.

13.Many of them wonder that, how to login to the system. You can get login screen by just  pressing F2.

14.After logging to the system,you can see there are many options provided for configuring the ESXi and viewing the system logs.It also provided troubleshooting options as well.

That all from the VMWARE ESXi 5.1 installation part. Hope you liked it .
The next part will be installing http://ranjiththulasi.blogspot.in/2013/08/vmware-vcenter-51-server-installation.html to setup complete ESXi environment..


Thank you for reading this article.


ரஞ்சித்துளசி..

Wednesday, 24 July 2013

How to Backup and Restore Active Directory on Server 2008

Have you ever accidentally deleted a user account or an OU in Active Directory and wished you could restore it?
 Their Active Directory database had become corrupted from the updates. So what do you do? How can you restore AD?
Let’s talk about how to backup AD in Windows Server 2008 and how to restore it. Today I’ll show you:

  • what you need to do to get your Server 2008 ready for backup
  • how to backup Active Directory on Server 2008
  • how to perform an Authoritative Restore of Active Directory
  • how to perform Active Directory Snapshots

Prerequisites: Getting Server 2008 Ready for Backup


Before you can backup Server 2008 you need to install the backup features from the Server Manager.

1. To install the backup features click Start → Server Manager.

How to Backup and Restore Active Directory on Server 2008 - 1 

2. Next click FeaturesAdd Features

How to Backup and Restore Active Directory on Server 2008 - 2 

3. Scroll to the bottom and select both the Windows Server Backup and the Command Line Tools
How to Backup and Restore Active Directory on Server 2008 - 3 

4. Click Next, then click Install

Backing up Server 2008 Active Directory

Now that we have the backup features installed we need to backup Active Directory. You could do a complete server backup, but what if you need to do an authoritative restore of Active Directory?
As you’ll notice in Server 2008, there isn’t an option to backup the System State data through the normal backup utility..

How to Backup and Restore Active Directory on Server 2008 - 4

So what do we do? We need to go “command line” to backup Active Directory.
1. Open up your command prompt by clicking Start and type “cmd” and hit enter.
2. In your command prompt type “wbadmin start systemstatebackup -backuptarget:e:” and press enter.
Note: You can use a different backup target of your choosing
3. Type “y” and press enter to start the backup process.

How to Backup and Restore Active Directory on Server 2008 - 5
When the backup is finished running you should get a message that the backup completed successfully. If it did not complete properly you will need to troubleshoot.


How to Backup and Restore Active Directory on Server 2008 - 6

 Now you have a system state backup of your 2008 Server!

Authoritative Restore of Active Directory

So now what if you accidentally delete an OU, group, or a user account and it’s already replicated to your other servers? We will need to perform an authoritative restore of the Active Directory object you accidentally deleted.
1. To do this you will need to boot into DSRM (Directory Services Restore Mode) by restarting your server and pressing F8 during the restart.
2.Choose Directory Services Restore Mode from the Advanced Boot menu.
How to Backup and Restore Active Directory on Server 2008 - 7
3. Login to your server with your DSRM password you created during Active Directory installation.
4. Once you’re logged into your server and in DSRM safe mode, open a command prompt by clicking Start, type “cmd“, and press enter.
5. To make sure you restore the correct backup it’s a good idea to use the “wbadmin get versions” command and write down the version you need to use.
How to Backup and Restore Active Directory on Server 2008 - 8
6. Now we need to perform a non-authoritative restore of Active Directory by typing “wbadmin start systemstaterecovery -version:04/14/2009-02:39“.
Note: The version of backup will vary depending on your situation. Type “y” and press enter to start the non authoritative restore.
7. Go grab some coffee and take a break while the restore completes.
How to Backup and Restore Active Directory on Server 2008 - 9
8. You can mark the sysvol as authoritative by adding the –authsysvol switch to the end of the wbadmin command.
How to Backup and Restore Active Directory on Server 2008 - 10
9. But if you want to restore a specific Active Directory object then you can use the ever familiar ntdsutil.
For this example we are going to restore a user account with a distinguished name of CN=Test User,CN=Users,DC=home,DC=local. So the commands would be:


ntdsutil
activate instance ntds
authoritative restore
restore object “cn=Test User,cn=Users,dc=home,dc=local”


10. Reboot your server into normal mode and you’re finished. The object will be marked as authoritative and replicate to the rest of your domain.

Using Active Directory Snapshots

There is a really cool new feature in Windows Server 2008 called Active Directory Snapshots. Volume Shadow Copy Service now allows us to take a snapshot of Active Directory as a type of backup. They are very quick to create and serve as another line of defense for your backup strategy.
With your server booted into normal mode open a command prompt by clicking Start, type “cmd“, and press enter.
We are going to use the ntdsutil again for creating the Active Directory snapshots. The commands are:

ntdsutil
snapshot
activate instance ntds
create
quit
quit


How to Backup and Restore Active Directory on Server 2008 - 12
So now that you have a snapshot of AD, how do you access the data? First we need to mount the snapshot using ntdsutil. The commands are:

ntdsutl
snapshot
list all
mount 1
— (Note: You should mount the correct snapshot you need; for this example there is only 1.)
quit
quit

How to Backup and Restore Active Directory on Server 2008 - 13
Your snapshot is mounted, but how do you access the data? We need to use the dsamain command to accomplish this. Then we need to select an LDAP port to use. The command is as follows:

dsamain –dbpath c:\$SNAP_200905141444_VOLUMEC$\WINDOWS\NTDS\ntds.dit –ldapport 10001

The result should look like this:
How to Backup and Restore Active Directory on Server 2008 - 14 
Now we need to go to Start, Administrative Tools, then Active Directory Users and Computers.

Right click Active Directory Users and Computers and select Change Domain Controller.
 How to Backup and Restore Active Directory on Server 2008 - 15

In the area that says < Type a Directory Server name [:port] here > enter the name of your server and the LDAP port you used when running the dsamain command.
For my example it would be: WIN-V22UWGW0LU8.HOME.LOCAL:10001
How to Backup and Restore Active Directory on Server 2008 - 16 

Now you can browse the snapshot of Active Directory without affecting anything else negatively.

Your AD Backup Strategy

It’s always good to have a solid backup plan for your Active Directory. You can use a combination of backup strategies or just one of these methods for backing up your Active Directory. Make sure you tailor your Active Directory backup strategy to meet your company’s needs and make it easy to recover if disaster does strike.

You can use a batch .bat job as a schedule task to do the backup as you wish:


W2K8 -This will backup system state daily and keep the last  backups..You will need to install the W2K8 backup feature

if not exist f:\Backups\Logs md f:\Backups\Logs
wbadmin start systemstatebackup -backuptarget:f: -quiet >f:\Backups\Logs\SSBackup.log
wbadmin delete systemstatebackup -keepversions:1 -quiet >>f:\Backups\Logs\SSBackup.log


ரஞ்சித்துளசி


Using the Delegation of Control Wizard to Assign Permissions in Server 2008


Delegate Control of an Organizational Unit

Another great feature of Server 2008, is how the Delegation of Control Wizard simplifies adding rights for common tasks to groups or administrators.
We’re going to say that we’ve just started building our network, and we’d like to give our Helpdesk admins the ability to reset passwords for people. Since we don’t want the Helpdesk modifying other parts of our domain, we want to restrict their access rights to only that task, for the time being. The simplest way is to use the Delegation of Control Wizard, so we’ll start by going to our Administrative Tools and opening the Active Directory Users and Computers snap-in. Once we expand our domain, we’ll go down to the OU that holds our Helpdesk group, right-click on it, and choose Delegate 
 Control.

* To open Active Directory Users and Computers, click Start , click Control Panel ,  double-click Administrative Tools , and then double-click Active Directory Users and Computers .

*To open Active Directory Users and Computers in Windows Server® 2008, click Start , type      dsa.msc .

*In the console tree, right-click the organizational unit (OU) for which you want to delegate control.

  1. Where?
    • Active Directory Users and Computers\ domain node \ organizational unit
  2. Click Delegate Control to start the Delegation of Control Wizard, and then follow the instructions in the wizard.


sshot-2009-12-13-04-56-05 
The wonderful welcome screen of the Delegation Wizard pops up, and we click Next.

 
The wonderful welcome screen of the Delegation Wizard pops up, and we click Next.


We need to add our Helpdesk, so we click Add.

 
We type in the name of our group, helpdesk, and then click the Check Names button. Once it finds them in AD, the name will display fully, and we can click the OK button.


Once it shows up in our list of selected users and groups, we’ll move forwards by clicking the Next button again.


Now we get to the real power of the Delegation of Control Wizard. The wizard lists out the most commonly used tasks to delegate control for, but also allows you to add some of the more obscure rights as well through the Create a custom task to delegate option. Since we just want to give our helpdesk admins the right to reset passwords, we’ll choose that one from the list and click Next.

 
Next we’ll get a summary of all the controls we are about to delegate. It’s always a good idea to browse over this, just to make sure you didn’t accidentally check one of the wrong boxes by accident. Once we’re certain that everything looks good, we click the Finish button.